How to Use Azamax? – The Complete Guide

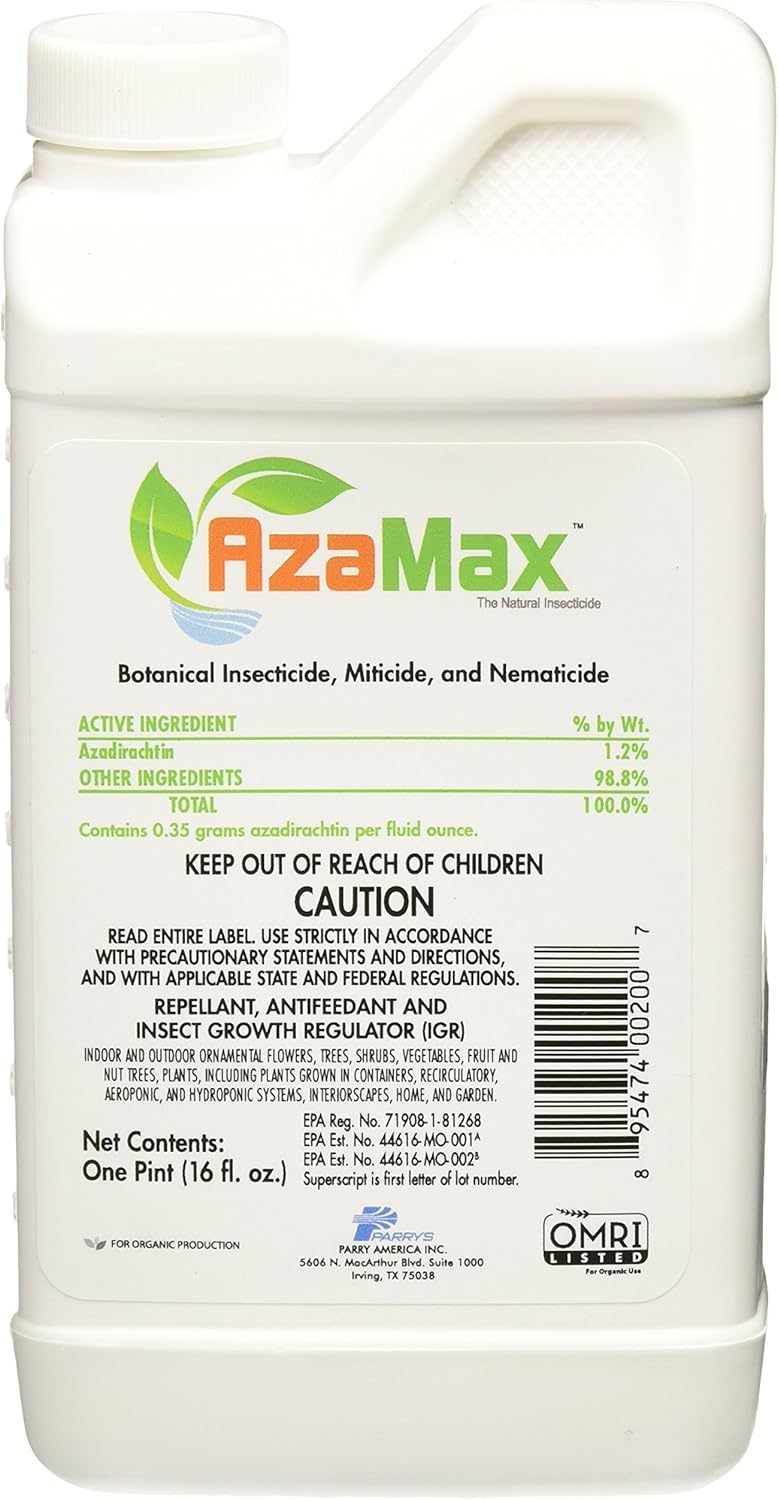
AzaMax is widely used because it is a natural product with a broad spectrum of pest control and broad plant applications. AzaMax is popular to growers because of its effectiveness.
Chances are your plants are facing some difficulties with bugs and you are searching for a solution. So, if you are confused about how you can properly use AzaMax to your plants, then you are at the very right place.
Because in this article, we are going to discuss how to use AzaMax in a detailed manner. We compiled here some easy steps for making your path even easier. Moreover, there is an FAQ section at the end of the article to rub-off any confusion regarding this topic.
So, please stay with us to know the ins and outs of using AzaMax in such a way that it works best.
Let’s get started then.
How to Use Azamax in Soil?
Well, here you go with the process of using AzaMax for soil drenching. Moreover, the process is almost the same for a foliar application. So, go through the steps below and we will clarify the rest.
As a soil drench product, AzaMax works effectively to control soil-borne insect larvae, including soil-borne larvae of foliar pests (e.g nematodes, fungus gnats, or soil-borne thrips).
Before you use AzaMax as a soil drench, please read the instructions that came with your product. You should not skip the instruction and only go through this article. We are here to make the process easier for you.
Now, check the quick rundown here to use AzaMax in soil.
Step 1: Get a Gallon of Water
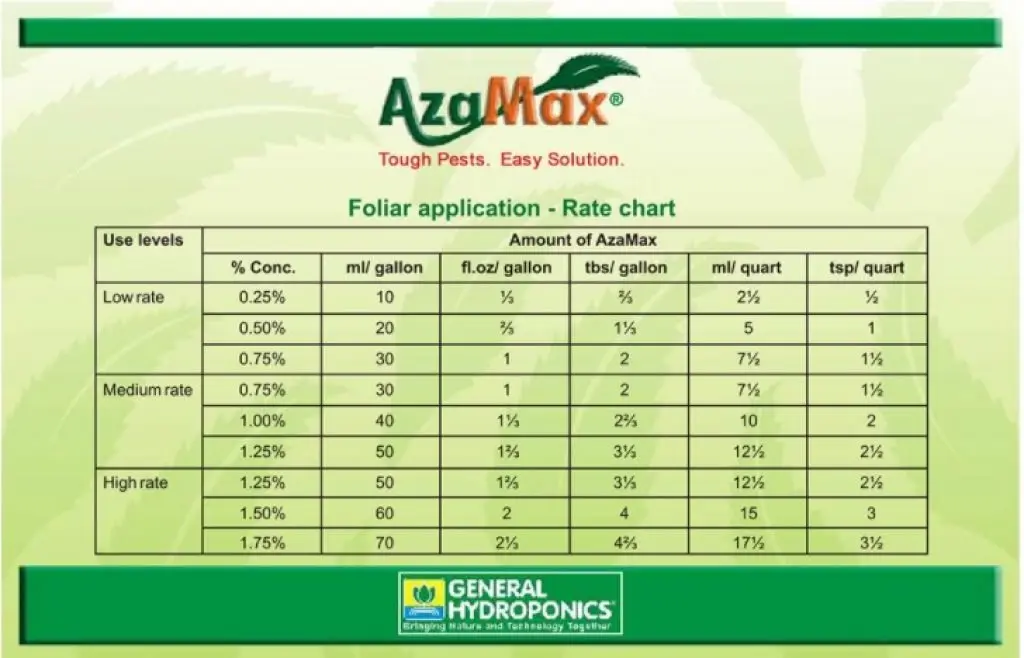
First of all, get a gallon of water. If you want to use AzaMax just as a preventative, then taking 1tbsp AzaMax in one-gallon water is perfect. But if you have bugs and want to get rid of them, then 2 tbsp per gallon for the soil drench will give you the most effective solution.
Step 2: Unpack the Azamax
Now, take the product in your hand and look over the instructions. You may ask how much AzaMax to use per gallon? Well, for just a prevention 4% of the solution is okay which is just 1tbsp in per gallon water. So, hence, use a measuring spoon that you only use for your plants, not in the kitchen.
Step 3: Pour a Little of the Water in a Bowl
Instead of putting the product in the gallon of water and hoping that you can mix it well without messing it up or dripping it everywhere, you better pop a little bit of water in a bowl. Using a glass bowl will be wise.
Step 4: Add the Azamax to The Water
Now, take 1 tbsp of AzaMax and pour it to the bowl of water. Mix it well with the spoon and you will see a milky color within a few moments. Mix it well until you get the milky color here.
Step 5: Put Back the Mixture into The Gallon Container
To mix it thoroughly, pour the mixture of the bowl into the gallon container. Pour it slowly and try not to drip it here and there. Now, shake the gallon container a bit to mix it properly.
Step 6: Take a Watering Can
Get something that you use for watering your plants. It can be a watering can or just a watering jug or whatever. And, all you need to do here is to pour some of the mixtures into your watering can from the gallon container. You may pour it first into the bowl and then from the bowl to the watering can. It will be easier. If you can’t trust your pouring skill, then go to the sink and finish the pouring job there.
Step 7: Apply The Mixture to Your Plants
That’s an easy, last step you will go through. Just take the watering can and water your plants with that mixture. This is a normal process like any kind of watering. But if you have something like cactus that you don’t water very often and you know it instantly going to drain through, then what?
Well, what you might do is to get yourself a bowl and hold it under the plant. Then, if the soil is super dry and all the drops are drained back out into the bowl, then you can rewater the plant until it seems like the plant is soaking up the product.
So, that’s that!
How to Use Azamax for Foliar Application?
The process of applying AzaMax for soil drenching and foliar application is almost the same.
Step 1: Get Water and Azamax
Since the application for soil and foliage is almost the same, we will sum up here the common steps. Hence, you have to repeat from step 1 to step 5 of how to use AzaMax in soil. This means you will get the water and the product. Then you need to mix them well (just like we discussed it before) and then move into step 2.
Step 2: Take A Sprayer
Once you are done with the 5 previous steps, you are going to take a sprayer for foliar application. And then you have to get back to the gallon container. Take it and pour the mixture into the sprayer you got.
Step 3: Spray Azamax to Your Plants
Anytime you do a foliar application, no matter what the product is, you are going to make sure that you do it to the whole plant, not just little priming the pump. Let the plant soak the product, let it drink well. This is the process for both ‘how to use AzaMax for spider mites’ and ‘how to use AzaMax for thrips’.
Voila! You are done with using AzaMax for killing the bugs in your plants.
How Often Should You Use Azamax?
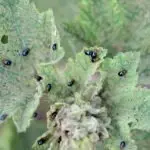
You are going to use this product three times in one month for soil drenching and foliar application, yes, that’s enough to prevent the problems. So, it’s likely you should use it every ten days a month. But if your plants are having a huge problem with bugs (e.g mealybug is covering your whole plants) then you can go as close as three days apart in a week.
And, something worth-adding here is that you make sure to spray the foliar application again 4-5 days after the first application. That will kill all newly hatched eggs before they mate again.
So, yes, that would be great.
How to Get the Best Result from Using Azamax?
For getting the best result from AzaMax, you should follow some instructions. Let’s check them out!
- Must shake the bottle before you use AzaMax
- Do not delay applying when pests are observed
- For a better result, apply 2-3 sprays
- If it is possible, target pests during immature stages
- Try to spray at a shorter interval under high pest pressures
- Make sure you apply AzaMax thoroughly to cover both sides of foliage at a high volume setting
- If it is possible, spray during the morning or evening hours
- Optimum pH is (5-6.5), use pH correctors if needed
- When you are going to combine with other products, check compatibility
- You can use alternations or combinations with insecticides, microbial etc.
- Try to use fresh spray solution and avoid storing any kind of spray for extended periods
- Repeat applications according to AzaMax label directions (in case of constant pest pressure)
The Common Features of Azamax
Some common features make AzaMax superior to other pest-controlling products. Such as:
- Unlike many neem-based products, AzaMax is not formulated using harmful surfactants, solvents, or preservatives. Moreover, it does not contain neem oil. Because of the potentially harmful impurities in some neem oil, no APVMA registration has been granted to any neem oil product.
- There is no other neem product that is as stable/effective as AzaMax. Because AzaMax is processed in such a way that concentrates as well as preserves the active properties of neem. The active properties are then formulated into a 1200 ppm emulsifiable concentrate of Azadirachtin that guarantees to have a shelf-life of up to 2 years as well as remain effective in crops after spraying for up to 14 days.
- There are up to 100 natural chemicals that all are aimed at having a negative impact on insects/pests. This feature makes azamax a versatile insecticide that eliminates the potentials for developing any chemical resistance.
- Azamax is safe to users.
Azamax Hydroponic Application
So, if you have any questions about azamax hydroponic (the method of growing plants without soil) application, then here you get your answer. All you need to do is to add 5-8 oz per 10 gallons of reservoir size.
Then agitate the mixture until the product azamax is thoroughly dispersed. The best option is to make 2-3 applications at 10-14 days of intervals (until the pest pressure is over). But if your plants are facing high insect pressure then make applications every 5-7 days.
Azamax VS Neem Oil
This is a burning question, ‘should I pick azamax or neem oil?’ The answer is azamax. Why? Because neem oil is too easy to burn up your leaves. On the other hand, azamax works best as a root drench or as a spray.
However, if you go for neem oil, then must be so careful that you apply the smallest amount necessary and apply it only during lights out or you will kill or seriously damage/burn your plant. So, why should you spray when lights out?
Because this can seriously burn or damage your plant if you spray when lights are on, for your clearance, think of a magnifying glass in the sun, same as a water droplet on a leaf.
Should You Use Azamax During Flowering?
Yes, there’s nothing to worry about using azamax during flowering. Even azamax is a better choice instead of neem oil application during flowering. Because use of neem oil in the flowering stage will affect the taste of your buds since it sticks to buds and is hard to rinse but it’s very effective in prevention.
For this, in the flowering stage you should use azamax since it leaves no red or sticky oil and can be used until harvest. And you can start now and spray once every 2 weeks in prevention or if you foliar feed spray, 1 day or 2 after each foliar spray feeding.
Conclusion
So, this is all we had to say to you. Hopefully, by reading this article, you now have a crystal clear idea about how to use AzaMax.
Before wrapping it up, we would like to give you a piece of advice. Practice ‘safety first’ during handling with the product. Try to be careful about the timing and using methods of it. And yes, be very careful when your plant is suffering and take actionable steps to help them feel good.
The FAQs About Using Azamax
Can AzaMax be mixed with nutrients?
Yes, azamax can be mixed with hydroponic nutrients for a few days without any negative effects residue in the rest that will need to be washed out. But it would be better if you in every other week as the oils will clog root hairs and make a mess, especially if full hydro.
Can you spray AzaMax with lights on?
No, you better spray azamax when lights are off. Otherwise, it can burn up or damage your leaves
Does AzaMax kill spider mites?
Yes, even using azamax to kill spider mites is one of the best options. Azamax will not harm the plant but kill spider mites efficiently.
What bugs does AzaMax kill?
Azamax can kill spider mites, fungus gnats, thrips, aphids, leaf miners, whiteflies, leafhoppers, worms, beetles, mealy bugs, scales, nematodes and other soil-borne pests.
Wish you good luck!
Related Plant Health Tips:
Black Spots on Succulents- 7 Causes With Cures
Mint Leaves Turning Brown: Reasons With Remedies
Problems with Blue Lake Pole Beans
Strawberry Plants Leaves Are Turning Brown
Types of Worms in Potted Plants